If you take a look at the notes at the bottom. Some specify a 1/4 turn. This means that bolt is taken to the point where it will be stretched and expected to clamp as hard as it possibly can. These bolts are usually never re-used (replaced) when the time comes to loosen it. Don't risk stretching a bolt twice, because it will snap. Prepare in advance :)
Monday, August 4, 2014
Thursday, June 12, 2014
What a blast!!
#pathofdestruction
#monsterjamnynj
#monsterjam
The Kids like go karts and monster trucks... I can see why!!
#monsterjamnynj
#monsterjam
The Kids like go karts and monster trucks... I can see why!!
Wednesday, June 4, 2014
Friday, May 30, 2014
Get familiar with ASE and how it works.
Mandatory Reads!!!
Click each link and check out what each has to show you. Come to class Monday prepared with questions. This is for our program completer's exam. I intend on testing you sometime next week, but first need to find an available proctor. We will be taking the ASE G1 Maintenance and Light Repair test.
Here is a free study guide with sample questions and answers. Challenge yourselves and don't skip ahead to the answers. Lets see how much you really know and if you can think like a machine!
Free ASE Study Guides
This is the official ASE study guide for ASE G1 Maintenance and Light Repair test. In this link you will find list of things you are expected to know and understand. There is plenty and you should know plenty of it. 7 Content Areas and 55 questions. Challenge yourselves!!
Offical ASE G1 Study Guide
ASE also put together a nice list of test taking tips. Browse through this as well. Might have some tips for you to consider on all types of tests.
ASE's Test Taking Tips!
Since this is a CBT (Computer Based Test) you will need to be familiar with the format before we actually take the test so you aren't wasting precious time figuring out the format. Take the sample test and click all of the buttons to try them out. GO ON!! TEST IT OUT!!
(Note: Make sure your pop-up's arent blocked as the test window is a POP-UP)
CBT Test Drive
Recommended Reads!
These are all of the other ASE Test Series available. There are tests to prove that you have what it takes in all areas of automotive service and repair. You might like buses, trucks, or just doing the machine work and finish work. There is a test for you to take and earn your certificate that will prove you are qualified!
ASE Certification Tests Series
This is a link to all of the other study guides available. If you would like to see how much you know or would like to know, go ahead and browse through them. This is a recommended read if you are interested in becoming an automotive technician and taking the ASE exams!
Test Prep Training Study Guides
Wednesday, April 9, 2014
A day in the life of a newbie.
Today we (Kelvin, Mike, and me) prepped an area in the wheel well for welding. It's the place where the brake line from the reservoir connects with the brake line to the caliper. Basically it was a hole in the engine bay that was cracked from wear and possibly hard braking. Fixing it was simple, we cleaned the area with a wire-wheel and MIG( metal inert gas) -welded the crack in.
Wednesday, April 2, 2014
In case you weren't sure!
This is where you are supposed to go for 1st and 2nd period tomorrow! 3rd period head to Dr. Nina's room.
Friday, March 28, 2014
There is someone restoring an old wagon on the internet as well.
I think this guy has run into more problems than us, but I am jealous that his is a manual transmission!!!
Click this link to see Fergus the 68 Country Sedan
Click this link to see Fergus the 68 Country Sedan
Thursday, March 13, 2014
This is our Google+ Community. If you are in the class and havent gotten in...
Click this link and request to join. From there you can make as many class-related posts you want. Here you can share pictures and ideas that will help us in our projects. Don't forget that you can include anything you think we'd like to see!!
Digital Profiles: YOU MUST HAVE ONE!!!
These days everyone and everything and their mothers are being "Googled".. What happens when nothing comes up?? Does this mean you don't exist? Certaintly NOT! The issue is that you may have great achievements and accomplishments, but the world knows nothing of them.
SO HOW DO YOU PROVE THAT YOU HAVE DONE WHAT YOU SAY YOU'VE DONE???
A portfolio, awards, credentials, final products... How many of those can you carry around with you to show when needed? What if you applied for a job, and before they considered your application, they "googled" you and when the results came in there was nothing about you.. NEXTTTT!! PICTURES OR IT DIDN'T HAPPEN..
Check out this MHS student's blog. He's posting his explorations and findings. He's already developed a great digital profile.
http://xavierz-enginework.blogspot.com/
This is Mr. Grosinger's Class' blog. He posts things here that him and his students do in class. He teaches a few classes in WNY's Memorial HS.
This is where the rubber meets the road! Google+ will allow us to easily keep each other up to speed on any of our progress and share photos of our work. Below you will find Mr. Grosinger's MHS Shop Class's Google+ Community. Here students are welcomed to share anything class related that they add to their blogs.
Friday, March 7, 2014
more recent findings
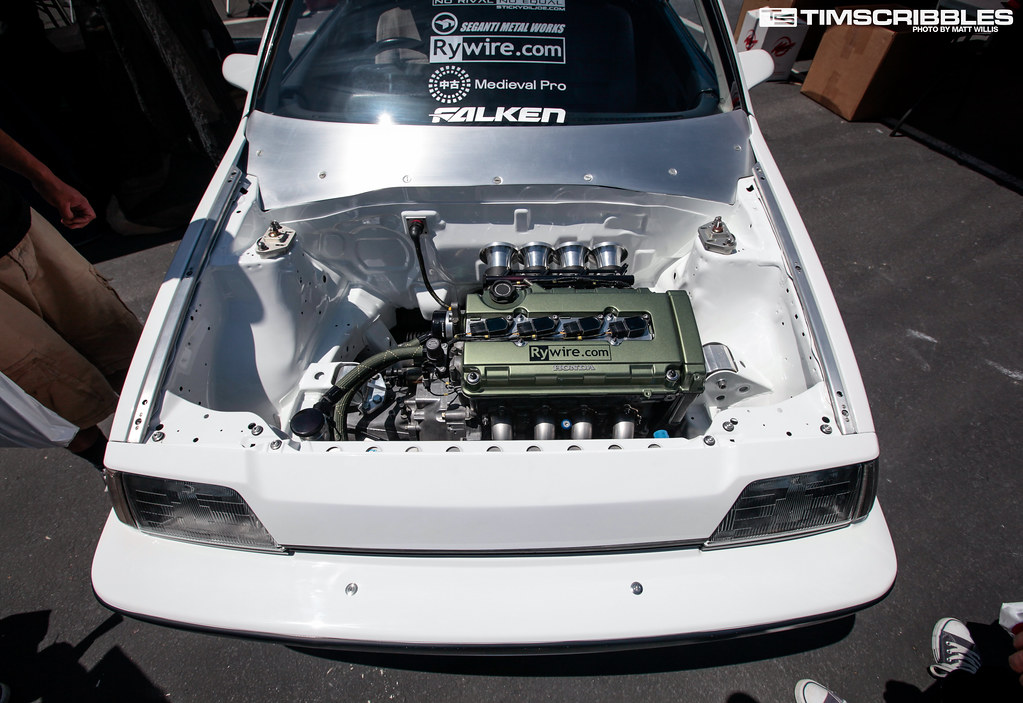
Ryan from RyWire is building another wicked Honda.. There is a shop helping him with the sheetmetal fabrication. Their work is impeccable!! Check out his build. Post comments on what you think!! Check all 12 pages of the build thread. Click here!
12-rotor engine.....
- This guy (Miura-san) makes all of the cool new high-end body kits in this small little shop in japan. Top Resin Art (TRA).
Click here to view the speedhunter's article (Remeber smoking cigarettes is bad!!)
- Unreal restoration shop. This is one of the places where the best in the business go.. Brabus
Click here to check the Speedhunters article.
- If you like art and cars.. seek no further. This Blown-Apart car art is mind blowing. Tons of work goes into it and the final products are very cool.
Click here for the speedhunters article.
- Tomcat S13 anyone??
Click this link to see what a Tomcat s13 is....
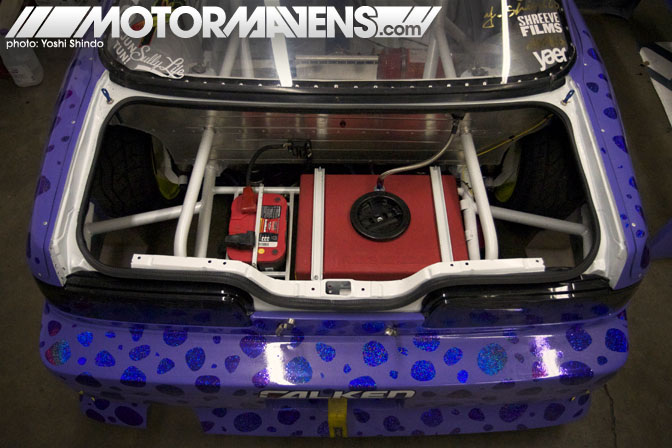
This builder's vision is super unique!! Check out the wild paint scheme on his s14:
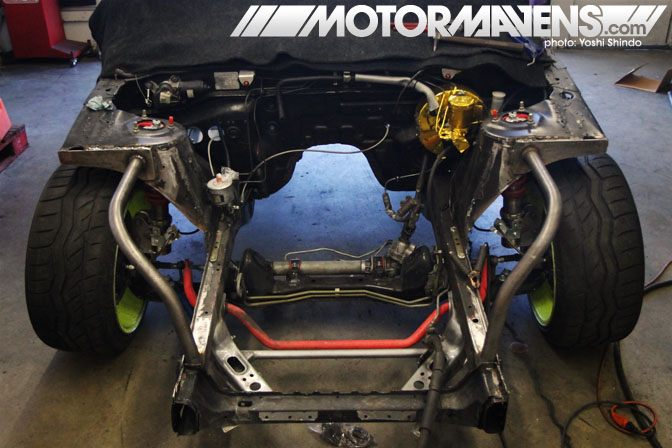
This is Ryans EA-T civic.. It is a running/driving car.. but how?? Nothing is hooked up to the firewall.. There arent any brakes.. Can you guys figure out how this is possible?
12-rotor engine.....
- This guy (Miura-san) makes all of the cool new high-end body kits in this small little shop in japan. Top Resin Art (TRA).
Click here to view the speedhunter's article (Remeber smoking cigarettes is bad!!)
- Unreal restoration shop. This is one of the places where the best in the business go.. Brabus
Click here to check the Speedhunters article.
- If you like art and cars.. seek no further. This Blown-Apart car art is mind blowing. Tons of work goes into it and the final products are very cool.
Click here for the speedhunters article.
- Tomcat S13 anyone??
Click this link to see what a Tomcat s13 is....
This builder's vision is super unique!! Check out the wild paint scheme on his s14:
Tuesday, February 25, 2014
Some of my recent findings.. Check them out!!
DONT JUST WATCH THE VIDEOS: I will be checking for knowledge of the forum posts.
Some beetle repair links to get us going again!
Very detailed website showing of the entire process for replacing the heater channels.
Great place to find parts.
I like what he did with the hole punch tool to prep for welding.
Another Very Rusty Convertible. Lets get our own thread going!!
This car is WILD!! But it can be done.
Couple of you have already seen this one, but it is clear and easy to use.
Just another rusty convertible getting some help!
For those of you looking to buy a used car. It is very important to have a checklist to go along with.
These videos are great!!
No easy feat, but this is how Bentley roofs are welded on.
Take a look at the cylinder head modifications going on here. Very much needed for high HORSEPOWER!!!
Check out this video.. Take note at 8:15... Look at how much the timing belt is stretching.. WOW!!
Look at this car Mavros. Check out his shop!!
Also take a look at his thread: Check out the Project Pad
Monday, February 10, 2014
Visited Wiring Specialties
This company in Connecticut focuses on selling pre-made engine wiring harnesses. They had some pretty wild cars in the shop. Check them out! www.wiringspecialties.com
Check out some of the things I've been reading!
Check out this "carspotting" post made about Walker Wilkerson's S13 on MotorMavens website: Click Here
I like how the front and the rear are chopped down and made tubular (easy to fix if you hit a wall drifting)
CNC machine work
Remember the other day I was talking about CNC type machine work. It is basically a type of computer controlled for machines. Any machine that a human can operate can also be operated by a computer. Remember your practice using the plasma cutter.. Check this CNC plasma cutting machine for example:
How about something a little more complex? The CNC 5 axis machining center can make things from scratch and even modify existing engine components. Some start with a solid chunk of material, and some start with an existing component.
Everything must start with design: Check out this site that shows the type of work that can be done with a CNC. Check out these examples
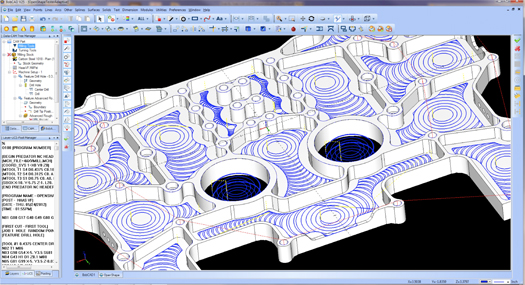
Programming the design in an accurate CAD drawing (computer aided design):
Sunday, February 2, 2014
Check Us Out Krusty's Fourm Post
Hopefully we did good tell us what you think thanks
-Krusty Team
240sx S13 Frame Rail Write up Repair
Hopefully we did good tell us what you think thanks
-Krusty Team
240sx S13 Frame Rail Write up Repair
Friday, January 24, 2014
a little TRIVIA for you!
Automotive Trivia
A. Above the pistons the cylinder head is machined completely flat rather than slightly domed. The combustion chamber is confined to the upper end of the cylinder.
B. The valve covers are made of cast iron which gives them a flat appearance compared to stamped metal valve covers. Sturdy cast iron (or alloy) is necessary because the rocker arm shafts are bolted to the valve cover rather than the cylinder head.
C. The exhaust and intake valves are located beside the piston in the engine block. The cylinder heads appear flat because they only contain combustion chamber space rather than all the valve train gear (rocker arms, valves, springs, valve covers, etc.) found on overhead valve (OHV) engine cylinder heads.
- RockAuto Monthly Newsletter
Thursday, January 23, 2014
Sometimes you just have to make it.
The snap-on adapter for our 18mm compression tester didn't have a valve core nor did it have threads to put one in (guess how we found that out). I had the snap-on rep send us a replacement, but this one didn't come with an 18mm adapter.... So I figured it was safe to assume more time would be wasted if I didn't take action.
I cut a valve stem off of an old wheel turned it down to .250" and then I drilled out the adapter to .251 and a little crazy glue.....
Having access to a lathe is invaluable.
I cut a valve stem off of an old wheel turned it down to .250" and then I drilled out the adapter to .251 and a little crazy glue.....
Having access to a lathe is invaluable.
Sunday, January 19, 2014
Finished cage
In this shot you can see the many tubes and where they tie into the front bottom of the half lateral and the footing.


In the picture below you can see were the cage is sent forward to the firewall. This is taken from under the steering wheel.
In this picture you can see the rear stays that support the main hoop on
the outer bends and the rear cross bars that support the center expanse
of the main hoop. Both of these sets of bars terminate at plates
footings on the tops of the rear shock (strut) towers.
This picture gives you a good idea of the relation of the cage and the
drivers controls. It also shows the forward components that connect to
the firewall.
Taken from the passenger foot well you can see the tubes that triangulate
towards the firewall. These tubes will help to keep the front half of
the car from bending up into the cage. On the other side of the firewall
is the back of the shock tower. You can also see the footings for the
front of the half laterals (that run along the driver and passenger
window/door openings) and how they are joined by the sill bar, bottom of
the door x-bar, and the bar that supports the top window bar.
Finished cage
Here are more pictures of the finished cage.
Below you can see the plating that was done to the top of the front shock towers to keep them from being ripped out in case of impact from a rough landing after clearing a jump!
Below you can see the plating that was done to the top of the front shock towers to keep them from being ripped out in case of impact from a rough landing after clearing a jump!


Here's a look at the back half of the cage you can see the seat mounts, harness bars, cross bars and in the right side of the picture you can see the rear stays that head to the rear shock towers to help support the main hoop and tie in the rear half of the chassis to the front.
Below is the footing for the main hoop right behind the outer sides of
the forward passengers floor pans. Notice how the plating is set up and
how the tube is welded into the corner, not just at the base. Also take
note how the tubes from the sill-bar (bar that runs along the bottom of
the door opening) and the bottom door bar (part of the bars that X in
the door opening) meet up at this point and tie into the main hoop.
So you wanted to see the finished product
Door bar gussets:

A-pillar to window bar support gusseted to the door bar.

Rear x-bar gusseted with the harness bars installed. Notice the
passenger harness bar is lower than drivers because the passenger seat
can be set lower.

Here you can see the seat mounting brackets.

Here's a look through the windshield opening where you can see how close
the half laterals that start on the floor and run along the a-pillars
(sides of windshield), bend tightly along the top of the door frame and
meet up with the main hoop that is behind the drivers.
Wednesday, January 15, 2014
So this week we started with roll cages and fabrication.
Andrew Garcia took a few more pictures of the car. Check 'em out!
Check these sites for more pictures and build progress on roll cages and the types of racing and the safety ideals behind it.
This link shows videos of the types of accidents rally vehicles must be prepared to withstand: http://www.bing.com/videos/search?q=rally+car+crash+youtube&FORM=VIRE1#view=detail&mid=544E67C1EC978DA5DAAA544E67C1EC978DA5DAAA
This company DIYAUTOTUNE is building a LSR (land speed racing) car. It is a 240sx, similar to the one you guys built this year. It has an enourmous amount of safety equipment due to the unpredictable nature of 200mph racing:
Check out this video of an LSR twin-turbo V8 that is in the process of being tuned on the dyno towards the end:
A grassroots effort to race on the salt! Compare this 240sx to the one built by DIYAUTOTUNE:
Check out Izzys cages. He shows plenty of detailed pictures of his builds. He build cages for any type of vehicle. He even shows pictures comparing good work vs. bad:
Can you design a cage for your future car?
Subscribe to:
Posts (Atom)


